In the Results Tree, expand the Instances container underneath the output database named PullHinge.odb.
From the list of available part instances, select HINGE-HOLE-1. Click mouse button 3, and select Replace from the menu that appears to replace the current display group with the selected elements. Click  , if necessary, to fit the model in the viewport.
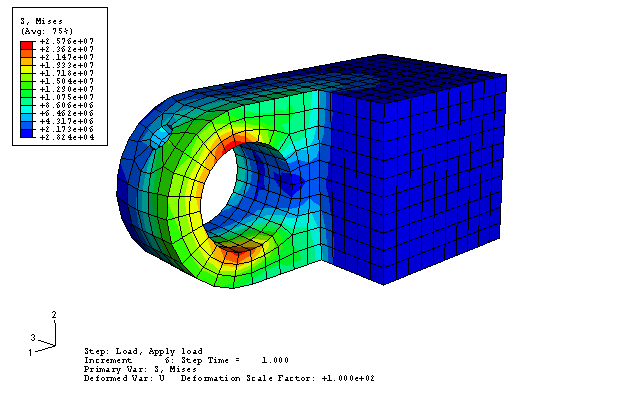
The contour plot of the entire model is replaced by a plot of only the selected hinge piece, as shown in Figure 1.
Figure 1. Use display groups to view a contour plot of the von Mises stress in the hinge piece with the lubrication hole.

Use the view manipulation tools to view the hinge at different angles. You can now see results for surfaces on the hinge that were hidden by the solid hinge.
From the main menu bar, select .
From the top of the Primary Variable tabbed page, toggle on List only variables with results: and choose at surface nodes from the menu.
From the list of variables that appears, select CPRESS, and click Apply.
Abaqus/CAE displays a contour plot of the contact pressures in the flange hole.
For more information about using the Visualization module, see the following sections:
You have now completed this tutorial and learned how to:
create and modify features;
use datum geometry to add features to a model;
use position constraints to assemble a model composed of more than one part;
define contact interactions between regions of a model;
monitor the progress of an analysis job; and
use display groups to view results for individual parts of a model.
 , if necessary, to fit the model in the viewport.