Context:
Select from the main menu bar to access the view options for the current viewport, as shown in Figure 1.
Figure 1. The View Options dialog box.
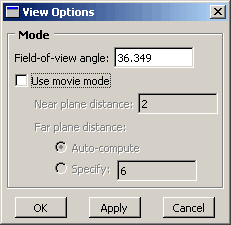
You can use the View Options dialog box to control:
The field-of-view angle (effectively, the magnification of the current view).
The camera mode (movie mode allows you to move the camera into and through the model).
The distance from the movie mode camera to the near plane (the closest distance an object can be to the camera while remaining in the view).
The distance from the movie mode camera to the far plane (the farthest distance an object can be from the camera while remaining in the view).
Note:
Specifying the near plane and far plane distance can improve the display performance for large models by excluding from view any portion of the model that lies beyond the specified range.
In the Visualization module the View Options dialog box also includes Camera Movement options. You can make the camera follow the motion of a local coordinate system and choose whether the camera also follows the rotation of the selected coordinate system. If movie mode is on, you can position the camera on the origin of the selected coordinate system. For more information on the view options in the Visualization module, see Customizing camera movement.
Select from the main menu bar.
The View Options dialog box appears.
If desired, change the Field-of-view angle to resize the view in the viewport:
Toggle Use movie mode on or off to switch between the default and movie camera mode.
Activating the movie camera mode does not change the current view. However, if you apply the default camera mode (toggle off Use movie mode), you will see one of the following effects:
-
If the model lies entirely within the frustum, the current view does not change.
-
If a portion of the model is cut off by the near or far plane, that portion reappears in the view and Abaqus/CAE resets the near plane and far plane distances to include the entire object in the view the next time you activate movie mode.
-
If the movie mode camera is positioned inside the model, the camera moves back along the current view direction so that the entire model is in front of the camera. Abaqus/CAE adjusts the field-of-view angle to display the model in a size similar to that in the movie mode view and resets the near plane and far plane distances to include the entire object in the view the next time you activate movie mode.
If desired, adjust the Near plane distance.
Abaqus/CAE removes from view any objects, or portions of objects, that lie between the movie mode camera and the near plane.
If desired, click Specify and adjust the Far plane distance.
By default, Abaqus/CAE automatically computes the far plane distance, setting it to a value beyond the farthest point in the model and adjusting it when you manipulate the view so that no part of the model is excluded from view. If you specify a distance, Abaqus/CAE removes from view any objects, or portions of objects, that lie beyond that distance from the camera.
Click OK to implement your changes and to close the dialog box.
Your changes are saved for the duration of the session.