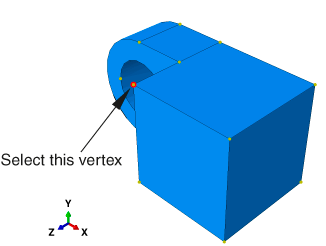
Create a displacement boundary condition in the Initial step, and call it Constrain. Apply the boundary condition to the vertex selected from the solid hinge piece, as shown in Figure 1. Figure 1. Apply a boundary condition to a vertex of the solid hinge piece.

Constrain the vertex in the 1-, 2-, and 3-directions. In the Load step, modify the boundary condition so that the hinge is unconstrained in the 1-direction. When you have finished creating boundary conditions, click Dismiss to close the Boundary Condition Manager.
|