If you are running the SIMULIA Execution Engine on Windows, verify that you have updated the Windows Firewall on the computer running the application server and the SIMULIA Execution Engine software.
For more information, see Configuring the Windows Firewall.
In the Name column on the right side of the console, click one of the following:
In the Additional Properties area on the right side of the console, click Data sources.
The Data sources screen appears.
Click New.
In the Data source name text box, type the following entry:
Fiper XA Data Source
In the JNDI name text box, type the following entry:
fiper/jdbc/XADataSource
Click Next.
For an Oracle database, do the following:
-
Enter the following information for the URL setting (in the Value text box):
jdbc:oracle:thin:@hostname:port:databasename
where:
hostname is the computer name where Oracle is running,
port is the appropriate port number on which the Oracle database is listening, and
databasename is the name of the SIMULIA Execution Engine database.
For example, if the hostname is dbcomputer, the port number is 1521, and the database name is SEE, the entry would appear as follows:
jdbc:oracle:thin:@dbcomputer:1521:SEE
-
From the Data store helper class name list, select the data store helper that matches the version of Oracle you are using.
For a DB2 database, do the following:
-
From the Driver type list, verify that 4 is selected.
-
In the Database name text box, type the appropriate database name (SEE).
-
In the Server name text box, type the name of the server that is running DB2.
-
If necessary, in the Port number text box, alter the port number on which DB2 is listening. If you do not know this port number, contact your local DB2 administrator.
Verify that Use this data source in container managed persistence (CMP) is selected.
Click Next.
From the Authentication alias for XA recovery list, select the J2C authentication alias you created for your database.
From the Component-managed authentication alias list, select the J2C authentication alias you created for your database.
From the Mapping-configuration alias list, select DefaultPrincipalMapping.
From the Container-managed authentication alias list, select the J2C authentication alias you created for your database.
Click Next.
Review the summary.
Click Finish.
On the right side of the console, click Fiper XA Data Source.
In the Additional Properties area on the right side of the console, click Connection pool properties.
Type the following information in the corresponding text boxes and click OK:
Connection timeout: 300
Maximum connections: 100
Minimum connections: 50
In the Additional Properties area on the right side of the console, click Custom properties.
Click New.
Type the following information in the corresponding text boxes:
Name: useRRASetEquals
Value: true
Description: See IBM APAR PK75897
Click OK.
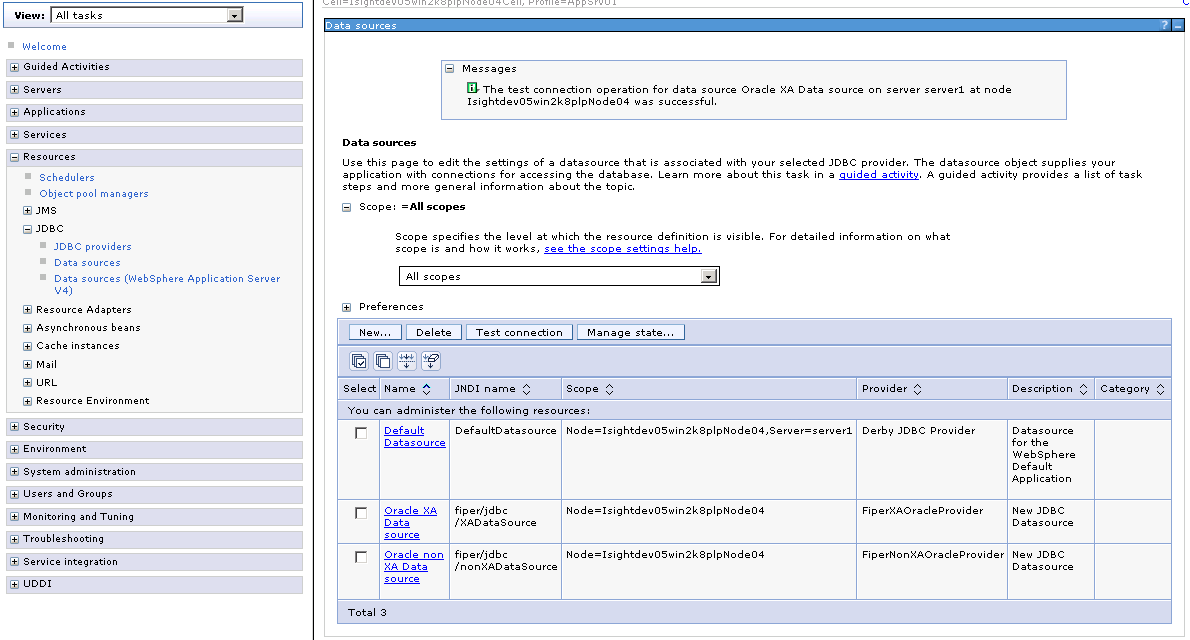
On the left side of the console, click Data sources.
The Data sources screen appears.
Near the top of the right side of the console, click Save to save the configuration.
In the Select column, click the check box that corresponds to the new data source.
Click Test connection.
A message appears, telling you that the test connection was successful.
Note:
If your test connection fails, verify that all the information is entered correctly. Confirm that you have disabled the Windows Firewall on the computer running WebSphere. If the Windows Firewall is active, you will not be able to connect to the system running the Oracle database if the database is running on a separate system. For more information, see Configuring the Windows Firewall.
Verify that the connection was successful.