From the View menu, select Library
or click the Library  button on the Design Gateway toolbar. button on the Design Gateway toolbar.
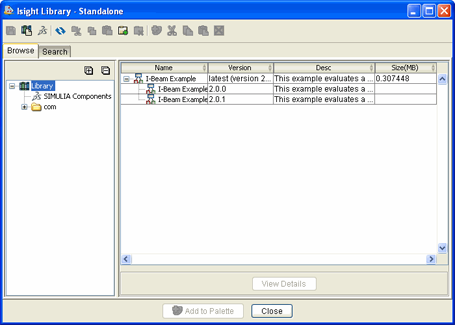
The Isight Library appears.
Locate the object for which you want to set permissions. If needed,
click the  button next to the object to view all the versions.
Select the version for which you want to set permissions (if you select
the object’s top row instead of a version row, you will be editing
the per-object permissions instead of the per-version permissions).
In the following example, version 2.0.1 of the I-Beam example is selected.
Click Edit Permissions.
The Version Access Control List dialog box appears
showing the permissions for the selected version.
Click Add to add a new permission.
Note:
You cannot edit an existing permission setting. Instead,
you need to delete it and recreate it.
In the Managed Name column, enter the name of
the user or group whose permissions you are setting.
Click in the Permission column, and select the
type of permission from the list that appears:
| Option |
Description |
|---|
| ALTER |
Select to give the
user or group full access to the object, including editing the object’s
permissions. The user or group can copy the object to the Isight library,
publish new versions of the object to the Isight library, and delete
any version of the object from the Isight library. |
| MODIFY |
Select to give
the user or group all the accessibility granted with the ALTER
option, with the exception of editing the permissions. |
| READ |
Select to allow the
user or group to use the object only in their local Design Gateway. If
the object is a model, its contents (e.g., components, simulation process
flows, parameters) can be viewed and altered and the model itself can
be executed, but no new versions of the model can be published to the
Isight library. |
| REFERENCE |
Select to provide
an extra level of security for published models. Typically, when using
a published model, you have access to all of the published model’s
contents (components, simulation process flows, parameters, etc.). However,
if this permission level is set for a user who incorporates a published
model into his or her model, all the contents of the model are hidden
from view. For more information on referencing models, see Using Submodels and Referenced Models. |
| NONE |
Select to give the
user or group no access to the published object. In addition, any model
that references this object cannot be used. |
Click the Represents column, and determine if
the name specified in the Managed Name column
represents an individual user or a predefined group:
| Option |
Description |
|---|
| USER |
Select to specify a particular user name
for the permission you are defining. |
| GROUP |
Select to specify a group of users to share
the permission you are defining, instead of creating a permission for
each user. |
Set object permissions for all other users (except for those explicitly
defined) by clicking All other users. The options
available are the same as those described in Step 7.
Arrange the listed users, as desired.
You can use the Up or Down
buttons to move a user up or down in the list. The selected user’s
settings move up or down one line. The order of your list is important because a user name may
appear in one or more groups as well as by itself. Therefore, it is possible
for a user to be assigned more than one permission for the same object.
If a user has multiple permissions, Isight uses the permission closest
to the top of the list to determine the user’s actual permission for
the object.
You can click Delete to remove a user from the
list.
Click OK to save your changes and to return to
the Isight library.
|